In this blog, our objective is to gain shell access to target device via UART interface. Once a successful connection is established, we'll explore the device's file system with the aim of locating stored credentials or configuration data. This process is a vital step in hardware analysis, as it can reveal sensitive information or help us better understand how the device operates internally.
Hardware Shell Access
In this lab session, we'll interface with TP-Link AC750 Mbps Wireless Portable Mini Travel Router (model TL-WR902AC) via its UART pins using a USB-to-TTL adapter. The goal is to gain shell access to the device and navigate through its file system in search of stored credentials.
Table of Contents
Objective:
Description:
In this lab session, we'll interface with TP-Link AC750 Mbps Wireless Portable Mini Travel Router (model TL-WR902AC) via its UART pins using a USB-to-TTL adapter. The goal is to gain shell access to the device and navigate through its file system in search of stored credentials.
Steps:
1. Connecting UART Pinouts to USB-to-TTL Converter:
- Use jumper wires or breakaway headers to link USB-to-TTL adapter to UART pins on the router's PCB.
- If required, solder wires or headers to ensure a stable connection.
- Connect Tx pin of USB-to-TTL converter to Rx pin on the router.
- Connect Rx pin of USB-to-TTL converter to Tx pin on the router.
- Connect GND of USB-to-TTL converter to GND pin on the router.
- Note: Do not connect Vcc pin from USB-to-TTL converter to the board.
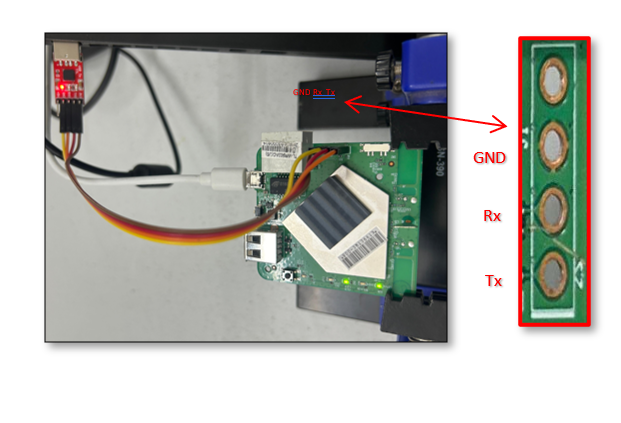
NOTE: The illustration depicts connections between a DIVA board and USB-TTL; similar connections can be established between a TP-Link AC750 Mbps Wireless Portable Mini Travel router (TL-WR902AC) and USB-TTL.
2. Shell Access:
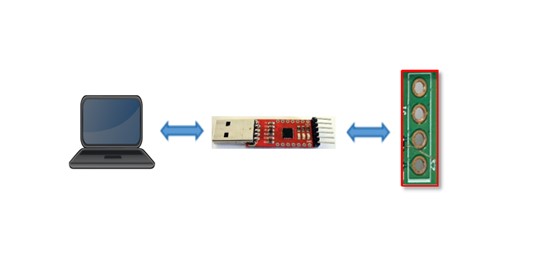
- After establishing physical UART connections, plug the USB-TTL converter into your laptop's USB port.
- Identify the connected serial interface, typically available at /dev/ttyUSB0.
- Power on the device and immediately launch a serial console utility to catch the boot process.
- Common utilities for serial console access include:
- picocom
- screen
- Use the following command to initiate a session with picocom:
Command:
sudo picocom -b <baudrate> -D <device>
Replace <baudrate> (e.g., 115200) and <device> (e.g., /dev/ttyUSB0) accordingly.
3. Baudrate Identification:
- Most devices use a default baudrate of 115200, but this can vary.
- If you see unreadable or "garbage" data in the terminal, it's likely that the baudrate is incorrect.


- Once you observe system logs or boot messages, and the terminal responds to commands like ls, it confirms that shell access has been successfully established assuming your wiring is correct.
- You can now begin exploring the file system and look for valuable data such as stored credentials.

4. Note on "Sending Discover" Messages:
- If the terminal becomes cluttered with repetitive messages like sending discover, these are typically generated by background services (e.g., DHCP clients).
- While they don't prevent shell access, they can be distracting.
- You may choose to terminate or kill related processes to maintain a clean working shell.
System Access Achieved
Gaining shell access through UART provides a powerful entry point into the inner workings of embedded devices. From observing boot logs to navigating the file system, this method offers valuable insights and potential access to critical data such as stored credentials. While UART doesn't always guarantee root access, it serves as a solid foundation for further analysis and exploitation.
Ready to Explore Hardware Security?
Contact us for comprehensive hardware and embedded system security assessments.
GET ASSESSMENT